The Patch Details.....
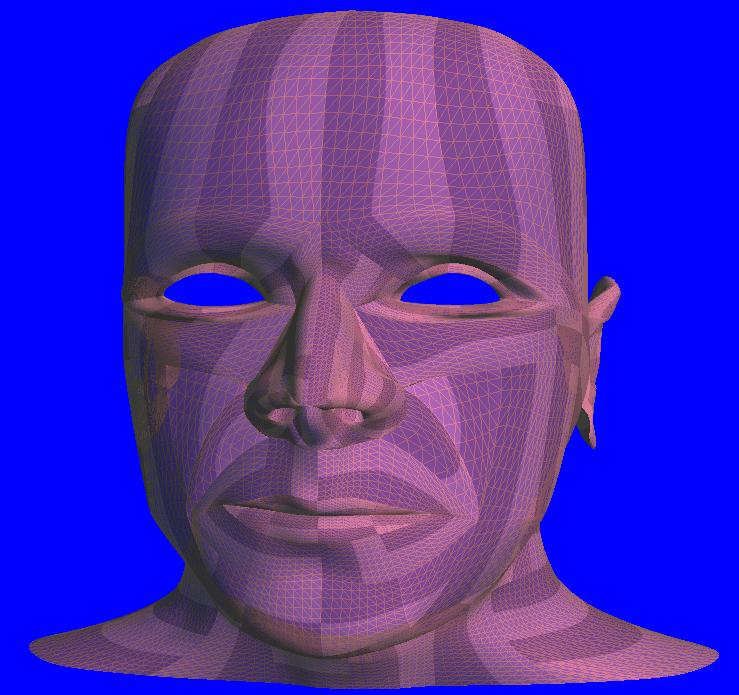
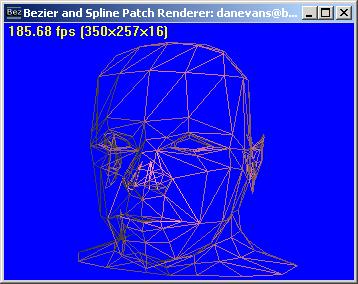
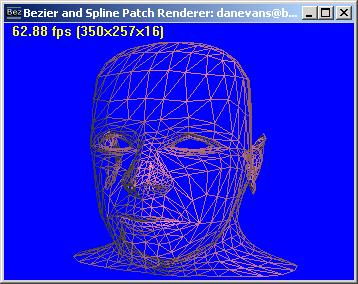
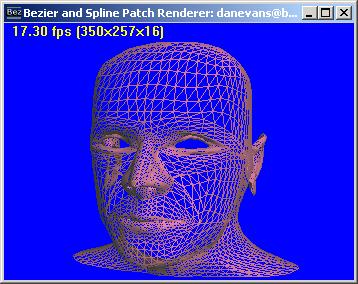
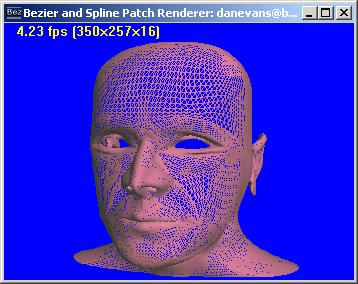
The main image is a photoshop composite of two runtime screen shots taken from my real time patch renderer showing both wireframe and solid fill of the standard generic head patch model that comes with MAX 2.5. You can alter the Level Of Detail dynamically at runtime, from just one set of input data which is considerably smaller than the space taken up by the vertex data generated for the highest level of detail. The reason for the rather uninteresting stripey "wallpaper" textures is because the plugin we need to map textures correctly onto patch models is still under development, as this is one area where MAX is currently lacking. The last of the four smaller images has around 42 thousand submitted polys which are being transformed, lit and rasterised by the Direct3D pipeline (Version 6.1) on a P3-500 machine with 128MB and an 8MB G200 card. If you look closely, you might just be able to make out that the more polygons the model has, the more he smiles ......download patch.zip (201kb) for DX6.1 or higher
Use this exporter (see link below) to create your own patch models. Note; you have to make the model centered around absolute 0,0,0 and no larger in extent than would fit into a 100,100,100 cube centered around the origin
download Max 2.5 patch exporter (patchexp.zip 87.5kb)
Projected Textures

Projected Textures are a very simple to implement feature with the new DirectX7 API.
Very important to get right, the FVF paramater you must pass to DrawPrim looks something
like this if you have 2d base texturemap coordinates and 3d lightmap coordinates per vertex;
D3DFVF_XYZ|D3DFVF_DIFFUSE|D3DFVF_TEX2|D3DFVF_TEXCOORDSIZE3(0)|D3DFVF_TEXCOORDSIZE2(1)
Although having said that you could just use D3DTSS_TCI_CAMERASPACEPOSITION and
not have to copy the vertices position into a 3d set of texture coordinates.
The other imprtant thing to do is setup the texture matrix....
D3DUtil_SetViewMatrix( matLight, LightFrom, at, up );
m_pd3dDevice->SetTransform( D3DTRANSFORMSTATE_TEXTURE0, &m_matProj );
m_pd3dDevice->MultiplyTransform(D3DTRANSFORMSTATE_TEXTURE0, &matLight);
where m_matProj is the projection matrix used for the viewing transform.
click here to download the demo and bitmaps (Project.zip , 74kb)
WARNING ! this demo only works on DirectX7 and upwards !
(Use the arrow keys to move the spotlight around.)
'Toon' and Anisotropic lighting.....
'Toon' is just slang for cartoon as the cartoon style is used to make 3d look 2-and-a-half-D, which looks pretty neat in my estimation. Want to know how I did it ? Well you're just going to have to employ me then aren't you ;)
Download the exe for yourself to look at. (232kb roughly, requires DX6.1 or above)
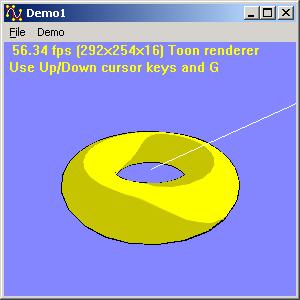
Toon rendering
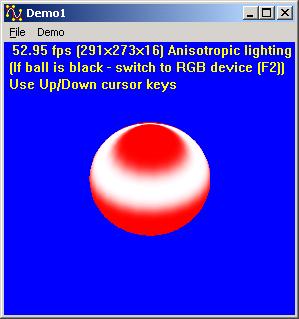
Anisotropic lighting effect